You may have the opportunity to sell items directly to your customers, in which you accept payment and give out the merchandise all at the same time.
Girl Scouts do this when they sell cookies at the entrance of a grocery store.
We call this a "Sales Booth Operation". Our Booth Sales function will help you track these sales and payments.
Booth sales have these characteristics:
- The customer pays for the item with cash, check, credit card, or debit card.
- You fulfill the order immediately by giving the merchandise to the customer.
- You have an Internet connected touch screen device available to record the sale.
- At the end of each shift, or when appropriate, you prepare bank deposits for cash and checks received.
The Booth Sales function is designed to be used on an Internet connected mobile device, like a tablet or smartphone.
All of the screen images below are from an iPad.
Before you can use the Booth Sales function, you must configure your fundraising drive to specify a Transaction Type for Booth Sales Deposits.
Select Booth Sales from the Fundraising menu. This will open up a new tab in your browser in which you will enter your sales.
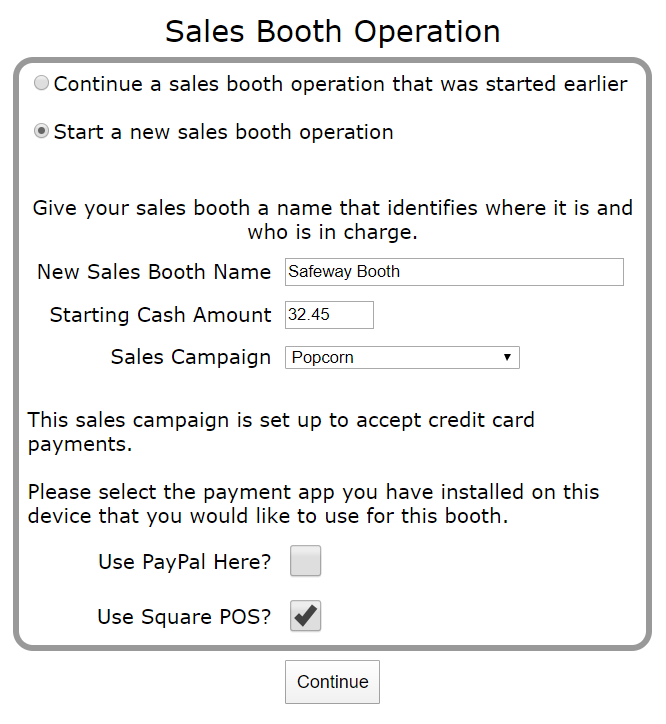
A "Sales Booth Operation" refers to a location where you will be selling merchandise over a period of time for a particular fundraising drive.
You can create a new sales booth operation by filling in the form shown above.
The Sales Booth Name should identify this operation and make it distinct from other sales booth operations you have underway.
 The Starting Cash Amount is the seed money that you put in your cash drawer when you began. The system assumes you will
leave this much money in the cash drawer when you make your bank deposits at the end of each shift.
If you select a sales campaign that is set up to accept credit card payments, you will be prompted for the type of credit card app you have
installed on your device.
The Booth Sales function can work with either of these apps:
Both of these apps are free, and their company will send you a free card scanner on request. They also offer devices that can read chips for a nominal fee.
Before you can accept credit card payments, you must:
In addition, we recommend that you disable the pop-up blocker from your browser and, if you are using PayPal Here, disable "Tips" in the Settings of that app.
Click the Continue button to begin selling!
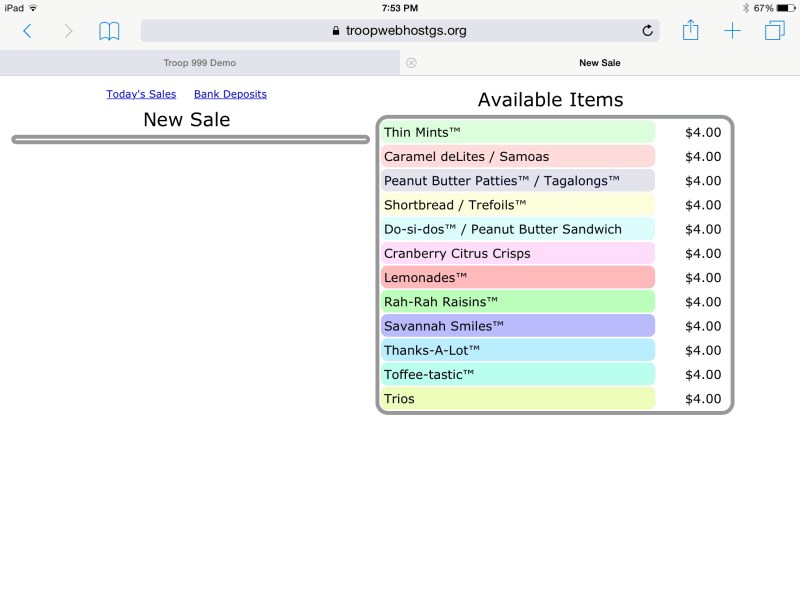
The New Sale page displays all of the items for this fundraising drive on the right side of the screen. On smartphones this list will appear at the bottom of the screen.
Tap on an item to add it to this sale. Tap on it again to increase the quantity.
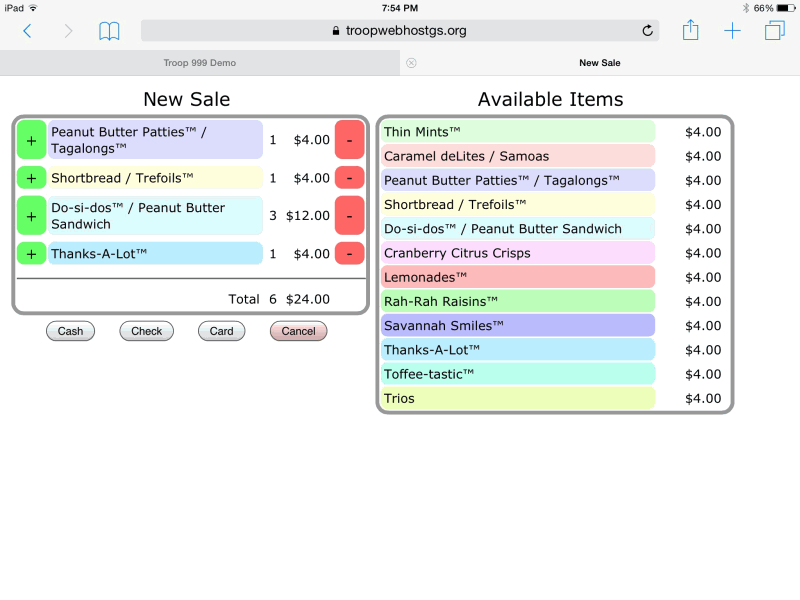
You can also adjust the quantity of an item by tapping on the + and - buttons.
When you are ready to process payment, tap on one of the buttons below the order.
Tap the Cash button to accept payment in cash.
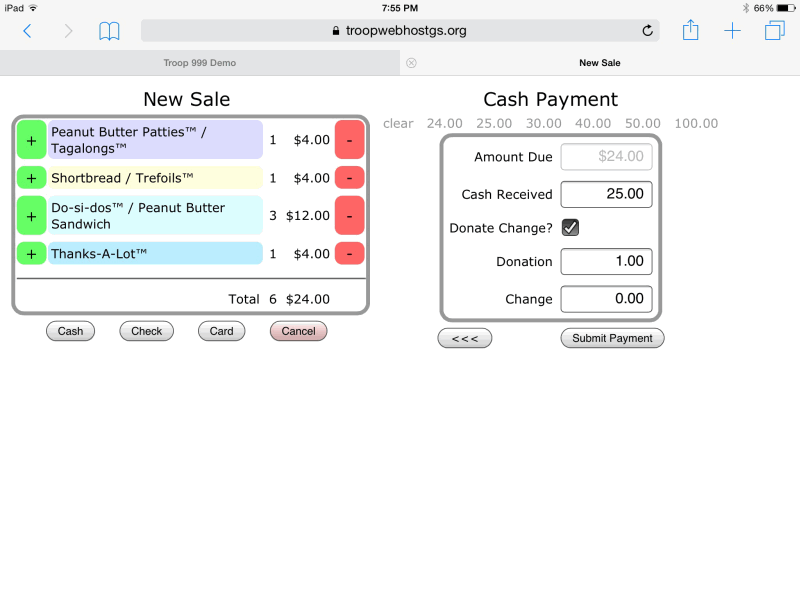
Right below the "Cash Payment" heading you will see several dollar amounts in grey. The first will be the exact amount of the order, followed by the next higher values in single dollars, fives, tens, twenties, fifties, and hundreds.
Tap on one of those values to accept that value as the Cash Received, or tap on the Cash Received field to enter this amount manually. Tap the "clear" link to clear out this field.
Tap the Donate Change? checkbox if the customer is donating the change. If the customer is donating a portion of the change, you can enter that value in the Donation field, and it will recalculate the Change amount.
Tap the Submit Payment button to complete this sale and start a new one.
Tap the Check button to accept payment by check.
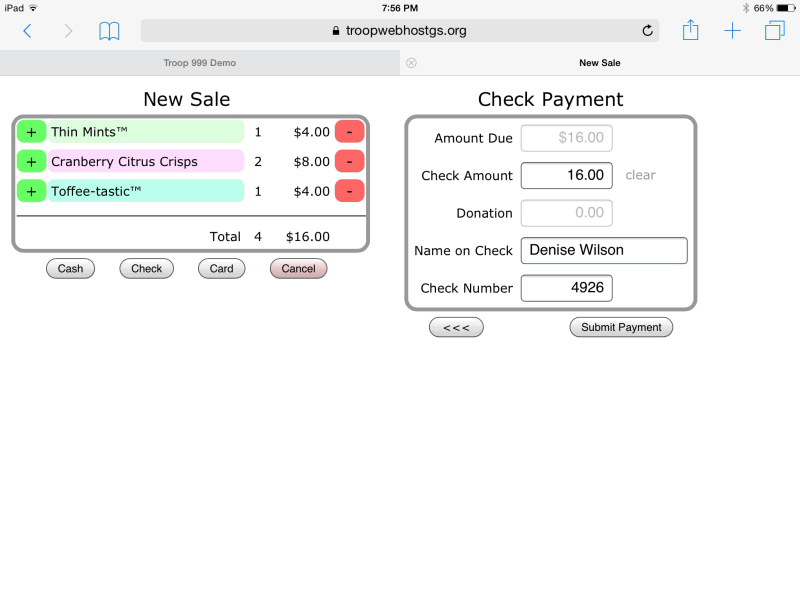
The Check Amount will default to the amount of the order, but if the customer writes the check for a larger amount (to include a donation) you can enter that value in this field.
You are not required to enter the Name on Check or Check Number, although this information may come in handy when you prepare your deposit slip later.
Tap the Submit Payment button to complete this sale and start a new one.
Tap the Card button to accept payment by credit card or debit card. This button is only available if you set up this sales booth operation for
PayPal Here or Square POS.
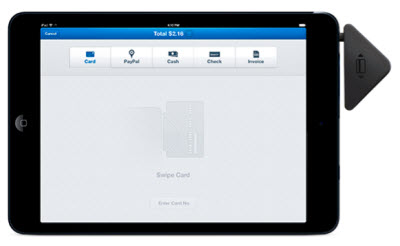
The Card button will open up the selected payment app on your device. The following example shows PayPal Here, but Square POS operates in much the same way.
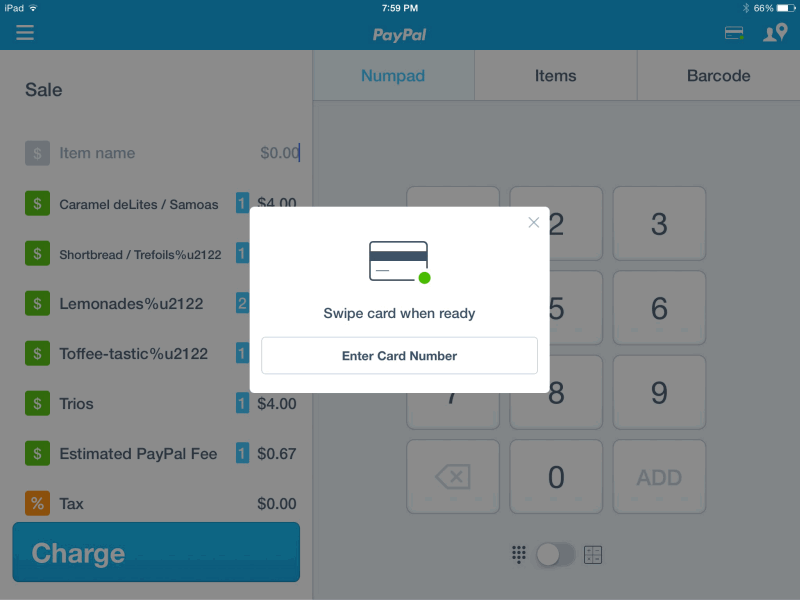
If you do not have your card reader plugged into the device, you will be prompted to do that now.
You may then scan the credit card as payment for this sale. Note that if this sales campaign is set up to require the customer to pay the credit card fee,
the estimated fee will be added to the amount of the sale.
PayPal Here will then prompt you for the customer's signature. The customer can use his finger to write his signature on the screen, then tap the Done button.
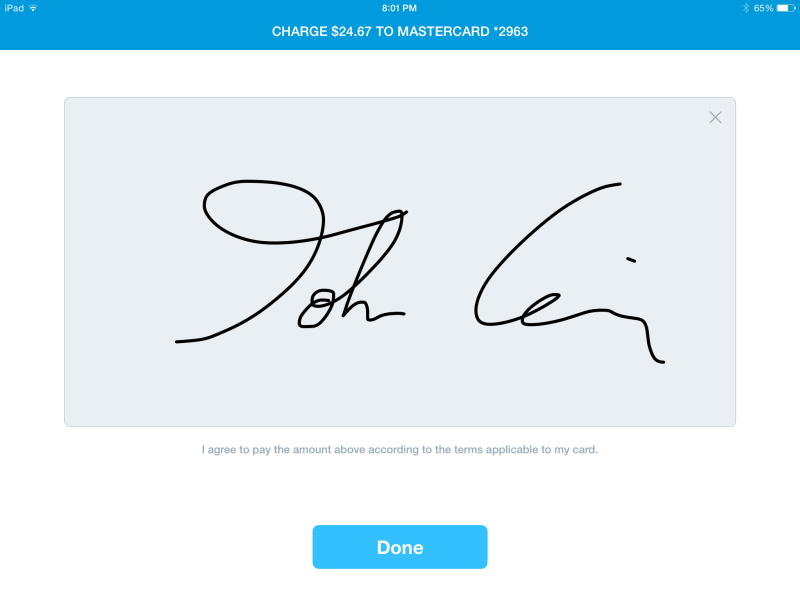
PayPal Here will give you the option of sending an electronic receipt to the customer. After that it will display the completion page shown below.
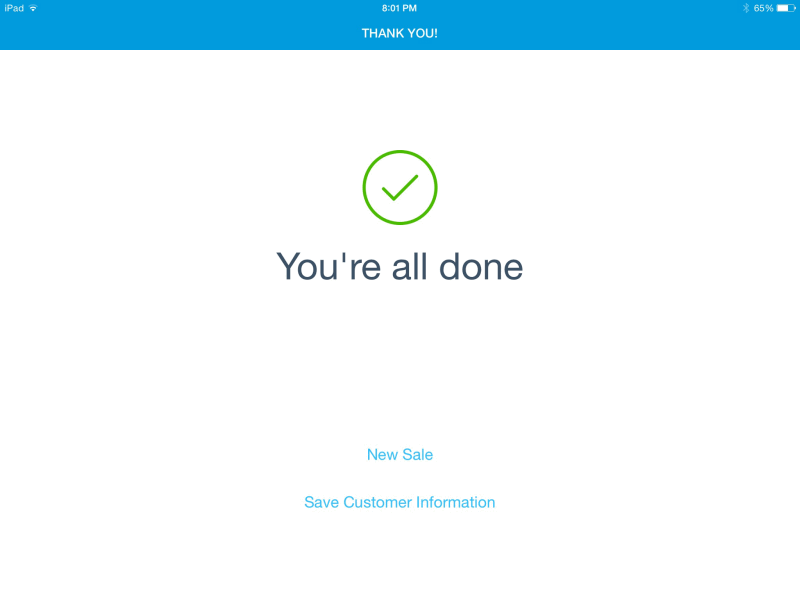
Tap the New Sale button to return to the Booth Sales page.
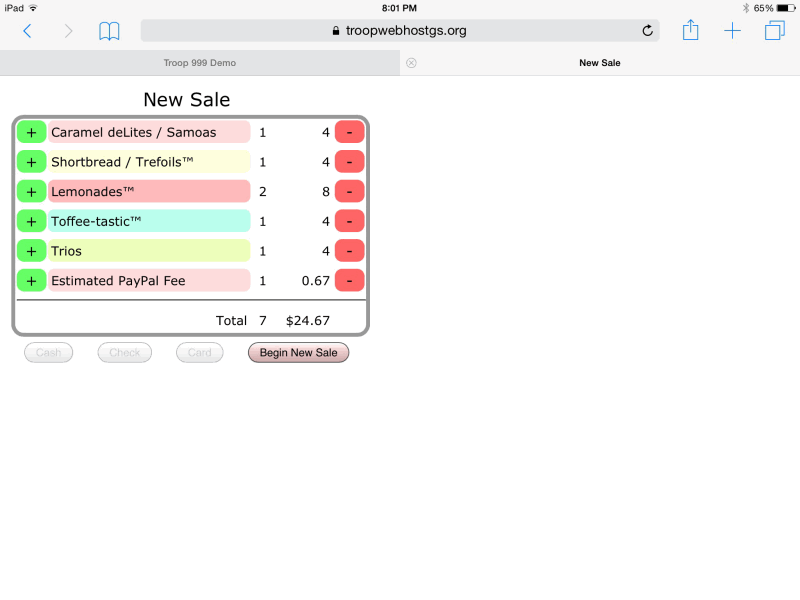
Tap the Begin New Sale button to be ready for your next customer.

Before you begin entering the next sale, notice the links in the upper left corner of the page (they will disappear once you begin the order.)
The Today's Sales link will display a summary of today's sales, as shown below.
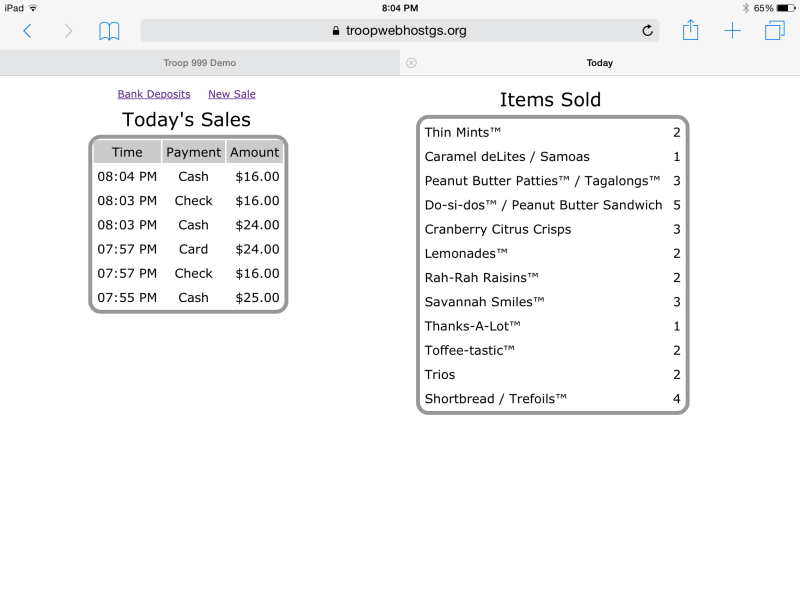
The Bank Deposits link will take you to a page that helps you prepare your deposit slip at the end of your shift.
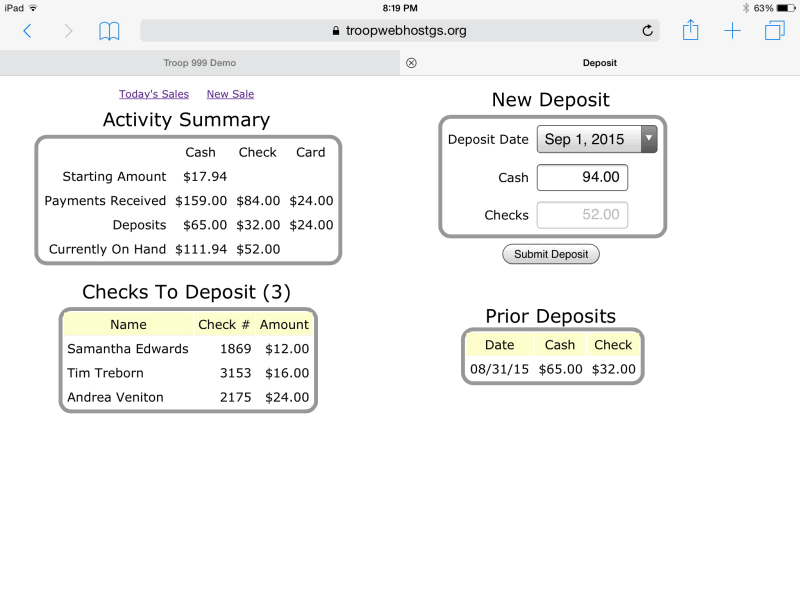
The Activity Summary section shows you a summary of payments accepted from the beginning of this sales booth operation.
The Checks To Deposit section lists all of the checks received since your last deposit.
The Prior Deposits section lists all previous deposits for this sales booth operation.
The New Deposit section allows you to submit a new deposit. This will create monetary transactions in the
TroopWebHostGS accounting system for these deposits.
The Cash amount will default to the amount of cash currently on hand, less the starting amount. You may enter in a different value if you prefer.
The Checks amount is set to the amount of checks currently on hand. You cannot change this value.
Tap the Submit Deposit button to record this deposit and create one transaction for the cash deposit and another transaction for the check deposit.